I‘m currently obsessed with installing web apps to my desktop and on my home screen. Using Command+Tab on macOS to switch between "sites" is built in to my DNA. 
As it turns out, several web apps I have installed are built with Rails, including GitHub, Feedbin, Mastodon, Hatchbox, Campfire, and the Rails Discourse forum. These Rails apps are installable because they are Progressive Web Apps.
Link to heading Rails 8 💜 PWAs
The primary mission for my contributions toward Rails 8 is now crystal clear: PWA. We can extract all the finickiness around web push notifications, for example, and make it trivially easy to use.
— DHH (@dhh) December 17, 2023
Rails 8 is coming soon which means, by default, a new Rails app will be installable as a Progressive Web App (PWA). A PWA can do a lot of things a normal web app can’t:
like receive Web Push notifications,

get native badge counters,
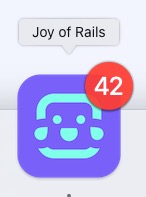
detect network connectivity info and provide fallback UX when network connectivity is degraded,

and access native-app-like APIs. In a nutshell, PWAs are upgraded web apps that can act more like native mobile apps. The good news is, you don’t have to wait until Rails 8.
In this article, I‘ll show you how to set up your Rails app to be installable as a PWA.
Link to heading Install Joy of Rails
Since Joy of Rails is itself a Rails app, you can participate in a live demo.
I invite you to install Joy of Rails to your desktop or home screen. Try it right now:
You can use the install button above to either launch the installation prompt in supporting browsers or, at least, view installation instructions for your browser. When the process completes, Joy of Rails will be available a standalone application on your device.
Go ahead, try it if your browser supports it. I promise I won’t spam you with notifications or any other nonsense. This is all in the spirit of learning and sharing. Of course, you can uninstall the app anytime.
(Think you found a bug? Feel free to let me know on Twitter or Mastodon. You can also report an issue on GitHub.)
You can also view installation instructions for various browsers below:
If it worked, you should be able to open Joy of Rails as a standalone application. Voilà! 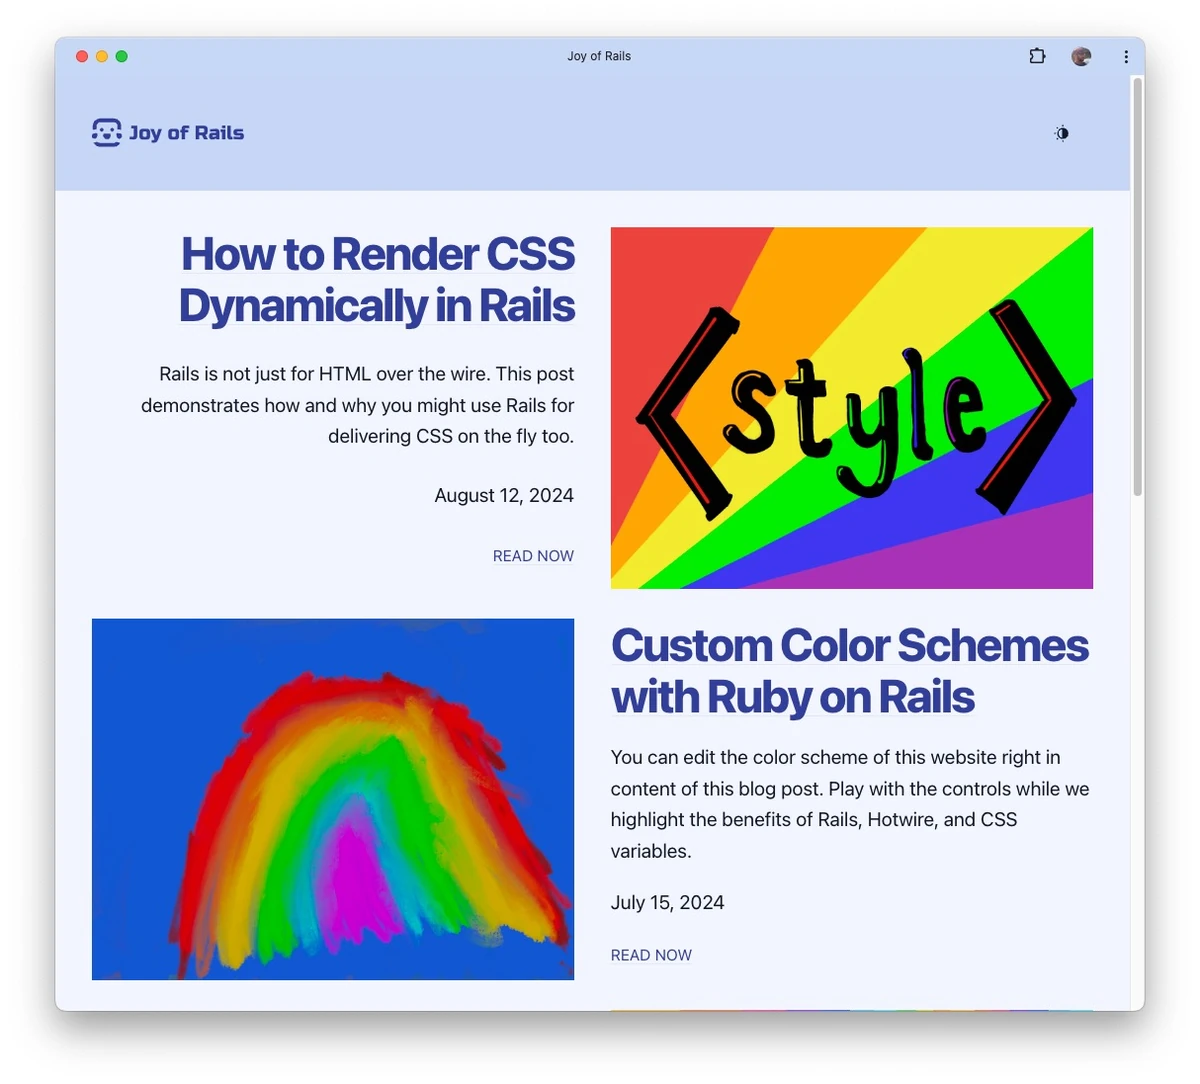
Link to heading What does it mean for a web app to be installable?
We‘re not talking about simply adding a bookmark to the site to the desktop or home screen. Installed PWAs can more deeply integrate with your device.
- A PWA can be installed like a platform-specific app without the need of an App Store*
- In some browsers, we can customize the install process.
- An installed PWA gets an app icon on the device, alongside platform-specific apps.
- An installed PWA can be launched as a standalone app, rather than as a website in a browser.
*I haven‘t tried this yet, but PWAs can also be submitted to various app stores (more info.)
Link to heading Ok, so what?
I admit, installing web apps to your home screen isn‘t for everyone. But I‘m a big fan of the Web. I want the Web to win.
As a product developer, I prefer to build for the Web. I don‘t want to invest the extra time and effort to build a mobile app alongside a separate web experience nor do I look forward to going through the pain and process of getting approval from the App Store. I want my end users to have the latest updates immediately. I value the traditions of the Web: everyone has a place.
As an end user, I prefer the Web too. But, when it comes to mobile, most end users generally prefer (or are simply indoctrinated) to use native apps. I can‘t help but feel if the Web is going to win, both product developers and end users may need to be willing to embrace Progressive Web Apps capabilities so that web apps can compete on native app "turf".
Making your app installable is the first step.
There‘s something pretty powerful about being able to deliver an app experience without building a separate native app.
I bet you‘d like to see your web app launch from the home screen or the Dock or the Launchpad, or from wherever, right alongside those native apps that live on your device.
Let‘s see how.
Link to heading Prerequisites for making your app installable
For your Rails app to be installable, there are a few requirements for your application and the end user.
Link to heading Your end user:
- Does not already have the app installed
- Accesses your application using a supporting browser
- Passes certain browser-specific heuristics. For example, in Chromium-based browsers, the end user must have interacted with your application and been active for more than 30 seconds.
Link to heading Your app:
Serves responses over HTTPS (or HTTP for loopback addresses like
localhostand127.0.0.1)Registers a valid web manifest file in the HTML document, and
the web manifest minimally declares the following properties:
name: the display name of your web app (info),icons: an array of icon data including sizes192x192and512x512(info),start_url: typically, the absolute url of your app‘s landing page (info),display: one offullscreen,standalone, orminimal-ui(info),prefer_related_applications: indicate you don‘t want to push users to a mobile app instead, so either omit this property or set tofalse(info)
For more on browser-specific installation criteria, I‘ve collected a few resources below:
Be sure to check out additional manifest properties to enhance your PWA experience, including a entry for screenshots (info) to display in app stores, theme_color (info) and background_color (info) for theming app ui and install splash screens, and shortcuts (info) for additional links to register in the supporting devices.
Link to heading Setting up your Rails app
Here’s how to get your Rails app configured to be installable as a Progressive Web App.
Link to heading Your app is served over HTTPS
The first thing to do is make sure your Rails app will be served over HTTPS. We can check config/production.rb to make sure requests will be forced to HTTPS:
Rails.application.configure do
  # Force all access to the app over SSL, use Strict-Transport-Security, and use secure cookies.
  config.force_ssl = true
end
Your deployment environment should also be set up to provide valid SSL Certificates for your domain. If you‘re using a platform-as-a-service like Hatchbox, Heroku, Render, or Fly.io, this will most likely be taken care of for you.
If you’re using or planning to use Kamal for deployment, Kamal 2 will support for SSL certificate generation via Let‘s Encrypt.
Kamal 2 will ship with Let's Encrypt and multi-app-per-server support out of the box. No Traefik needed.
— DHH (@dhh) May 14, 2024
For testing your app installation locally, good news is there’s no special set up needed in this regard. Progressive Web App functionality, including app installation, is supported over HTTP from localhost. 
Link to heading Provide a manifest file
Since the Rails 7.2, Rails provides defaults for Progressive Web App manifest JSON and serviceworker JavaScript files (pull request).
In your Rails 7.2+ config/routes.rb file, make sure you have the following routes added, especially the manifest:
Rails.application.routes.draw do
  # Render dynamic PWA files from app/views/pwa/*
  get "service-worker" => "rails/pwa#service_worker", as: :pwa_service_worker
  get "manifest" => "rails/pwa#manifest", as: :pwa_manifest
end
Your application layout should render a <link> tag for the manifest file:
<!DOCTYPE html>
<html>
  <head>
    <!-- -->
    <%# Enable PWA manifest for installable apps (make sure to enable in config/routes.rb too!) %>
    <%= tag.link rel: "manifest", href: pwa_manifest_path(format: :json) %>
  </head>
  <!-- -->
You should also have corresponding files in app/views/pwa:
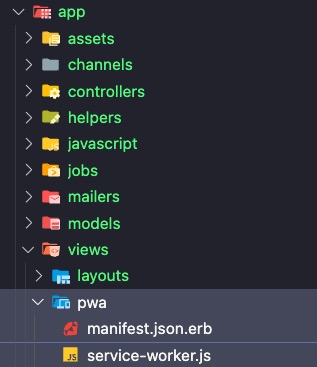
manifest.json.erbserviceworker.js.erb
The contents of manifest.json.erb is important for app installation. Only the manifest file is needed, but the serviceworker will come in handy for additional PWA features.😉 You can subscribe to my newsletter to get notified when I post more on this subject and other Rails-relevant content.
For a newly generated Rails 7.2 application, this is what you’ll see in manifest.json.erb:
{
  "name": "YourNewApp",
  "icons": [
    {
      "src": "/icon.png",
      "type": "image/png",
      "sizes": "512x512"
    },
    {
      "src": "/icon.png",
      "type": "image/png",
      "sizes": "512x512",
      "purpose": "maskable"
    }
  ],
  "start_url": "/",
  "display": "standalone",
  "scope": "/",
  "description": "YourNewApp.",
  "theme_color": "red",
  "background_color": "red"
}
The default manifest may be enough for minimal manifest criteria to allow your app be installable, but (as of this writing) browsers may require an icon with dimensions 192x192 (more on icons below).
Link to heading What if my app isn’t on Rails 7.2?
That‘s ok! If you can’t upgrade now, you can still set up your Rails app similarly. You would add routes and view files as described above.
You‘ll additionally need to add a controller like the one provided by default in Rails 7.2+:
# frozen_string_literal: true

class Rails::PwaController < Rails::ApplicationController
  skip_forgery_protection

  def service_worker
    render template: "pwa/service-worker", layout: false
  end

  def manifest
    render template: "pwa/manifest", layout: false
  end
end
Link to heading Setting up your icons
As mentioned previously, you should have, at minimum, two square images to represent your app icon on install screens: 192x192 and 512x512. If you started from a new Rails 7.2+ app, you‘ll want to remove the generated app icon from the Rails app generator and make your own.
Here are the app icons for Joy of Rails: 

I used ImageMagick 7 to convert these icons from the original with a command like:
magick ~/path/to/original/icon.png \
  -gravity Center \
  -crop 700x700+0+0 \
  -resize 192x192 \
  app/assets/images/app-icons/icon-192.png
I recommend starting with an svg or png file at max resolution to use as the source for generating your PWA icons.
For help generating your icons, you can try the website PWABuilder which provides a free Image Generator tool. This tool accepts a source image and will generate a lot of different versions of your app icon. Feel free to use all of them or pick and choose.
If you‘re using Vite Ruby to build assets for your Rails app, you may want to look at Vite PWA assets generator as an alternative.
Link to heading A word on maskable icons
Some browsers will present the icon in a circular window that will crop a significant portion of the icon. If I were to use my primary Joy of Rails app icon, it would look cramped when masked: 
My approach is to use a separate set of icons with more room to breathe. Compare the two variation: 

The new icon a lot better when masked: 
A maskable icon falls within the "safe zone", a term that comes straight from the W3C:
The safe zone is the area within a maskable icon which is guaranteed to always be visible, regardless of user agent preferences. It is defined as a circle with center point in the center of the icon and with a radius of 2/5 (40%) of the icon size, which means the smaller of the icon width and height, in case the icon is not square.
In your manifest, you can add variations for each size and mark their purpose as maskable.
{
  // ...
  "icons": [
    {
      "src": "<%= asset_path("app-icons/icon-192.png") %>",
      "type": "image/png",
      "sizes": "192x192"
    },
    {
      "src": "<%= asset_path("app-icons/icon-192-maskable.png") %>",
      "type": "image/png",
      "sizes": "192x192",
      "purpose": "maskable"
    },
  ],
  // ...
}
You can preview the safe masking area for your icons in the Chrome DevTools > Application > Manifest > Icons: 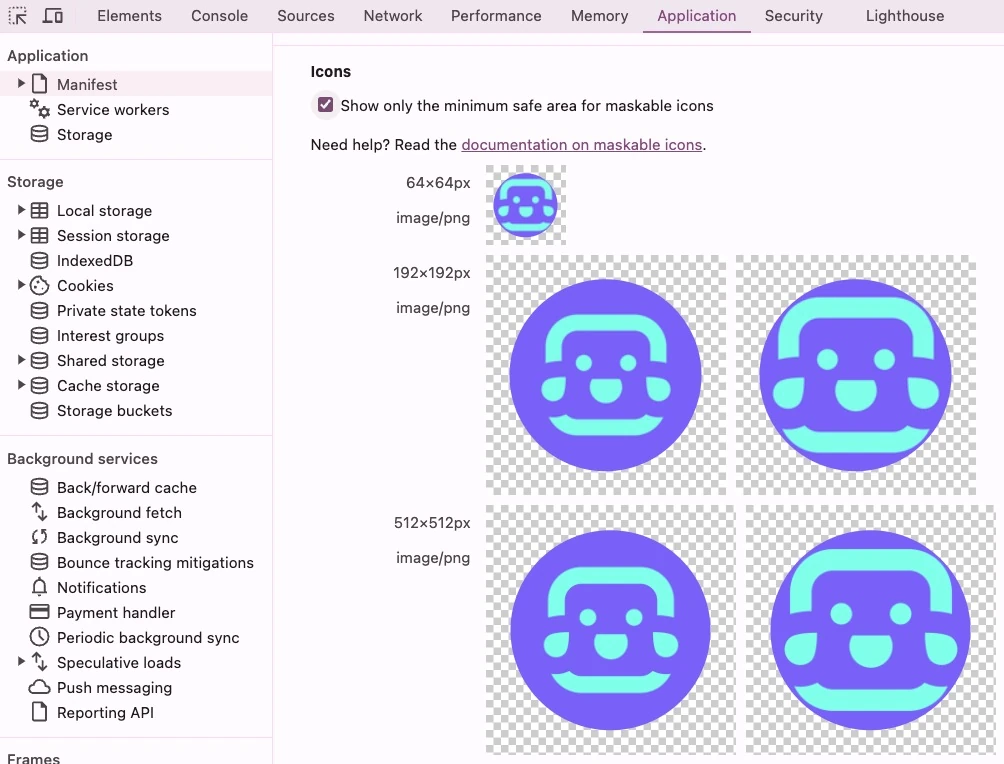
I know, I know... one more thing to deal with!
You have some help: I recommend Maskable.app, a free tool to preview and edit your icons with different masking and presentation styles.
Link to heading Where your icons should live 🐮
While you can place your own icons in the public/ directory like the default, I prefer to places the icons under app/assets/images and let Propshaft provide a fingerprinting url for the icon images. (You can also use Sprockets, Vite Ruby, etc.)
Since the manifest.json.erb file is dynamic like any other Rails ERB template, you can use an asset path helper to reference to generate the icon URLs.
{
  // ...
  "icons": [
    {
      "src": "<%= asset_path("app-icons/icon-192.png") %>",
      "type": "image/png",
      "sizes": "192x192"
    },
    {
      "src": "<%= asset_path("app-icons/icon-512.png") %>",
      "type": "image/png",
      "sizes": "512x512",
    }
  ],
  // ...
}
With this approach, if I need to change the icons, the updated icon urls will update and (eventually) propagate to installed apps.
Link to heading Making changes
Speaking of updating manifests, at some point after you’ve launched your web manifest and made your Rails app installable as a PWA, you’re probably going to want to make changes.
The bad news is, from what I understand, only a subset of web manifest properties will trigger an update and the changes may take up to a day or two to propagate depending on different behaviors across various browsers and devices.
In short, don’t expect to see changes to your manifest immediately reflected in app behavior. But changes should get picked up eventually.
Here‘s a resource on how Chrome handles manifest updates including some tips on updating Chrome settings for local testing.
Link to heading Some things can‘t change
An important note! Chrome recommends uniquely identifying your app with the id property in your manifest—especially if you think your start_url may change (To top things off, changing the the URL to your manifest file may also be problematic). The crux of the issue is that, without an id, browsers will use the start_url to identify your application in which case, changes to your start_url may mean browsers are unable to correctly identify installed apps.
{
  "id": "joy-of-rails",
  // ...
}
To summarize how to uniquely identify your app:
- set
id - avoid changing the URL to the manifest if you can
Link to heading Optional: Customize the installation prompt
While each browser provides its own flavor of app install process, there is limited support for customizing the prompt like the custom button I’m using for the Joy of Rails.
This can be accomplished by intercepting the the beforeinstallprompt event in supporting browsers (Chrome, Edge, Android, at the time of this writing). This event is triggered prior to the browser presenting a prompt to install the PWA on the user’s device.
Here is a Stimulus controller that interacts with the beforeinstallprompt event to manage the app installation prompt.
import { Controller } from '@hotwired/stimulus';

let installPromptEvent;

window.addEventListener('beforeinstallprompt', async (event) => {
  event.preventDefault();

  installPromptEvent = event;
});

export default class extends Controller {
  async install(event) {
    if (!installPromptEvent) {
      return;
    }
    const result = await installPromptEvent.prompt();
    console.log(`Install prompt was: ${result.outcome}`);  // 'accepted' or 'dismissed'

    installPromptEvent = null;

    event.target.disabled = true;
  }
}
There is global event listener for the beforeinstallprompt event which is used primarily to cancel the event propagation and store the event as module-scoped variable.
The beforeinstallprompt event has a special method prompt().
In this case, the controller’s install action—let‘s say we‘re using a custom button to trigger this action—will call the prompt() method on the beforeinstallprompt event if it is defined. I‘m using async/await here because the prompt() method returns a promise. When called, the browser will open a prompt that asks the user if they want to install the app on their device. The promise resolves to an object with an outcome property: either accepted or dismissed determined by the user’s choice.
Link to heading How do I know if my user has installed my app?
I don’t have a definitive answer for this one yet.
So far, the most consistent method is to use feature detection for the browser’s display mode, which will match your manifest settings:
const isStandalone = window.matchMedia('(display-mode: standalone)').matches;
You could use this feature to customize UX behavior and report analytics. This approach will only work when an end user accesses your app from the standalone app after it has been installed.
You can try listening for the appinstalled event to receive notice when a user has installed your app. Unfortunately it is not currently supported in all browsers: https://caniuse.com/?search=appinstalled.
window.addEventListener('appinstalled', (event) => {
  console.log('App installed!', event);
});
There is also a newer API navigator.getInstalledRelatedApps(); that seems promising but it also not widely supported. See https://web.dev/articles/get-installed-related-apps for more info.
Link to heading Now you are ready
We covered a lot of ground! If there’s one key take away you’ll want to remember when you get around to making your Rails app installable is the manifest file. The manifest is how we advertise to the browser how we want our PWA to behave.
Rails 7.2+ apps are set up by default to serve the manifest dynamically but you don’t have to wait until you upgrade to take advantage; the key pieces can be constructed on your own with fundamental a controller and json template.
As a review, here’s the current manifest.json.erb for Joy of Rails:
{
  "id": "joy-of-rails",
  "name": "<%= Rails.configuration.x.application_name %>",
  "short_name": "<%= Rails.configuration.x.application_name %>",
  "description": "A place to learn about Ruby on Rails and how it makes web development a joy",
  "start_url": "<%= root_url %>",
  "theme_color": "<%= @color_scheme.weight_200.hex.to_s %>",
  "background_color": "<%= @color_scheme.weight_50.hex.to_s %>",
  "display": "standalone",
  "orientation": "portrait",
  "author": "Ross Kaffenberger",
  "developer": {
    "name": "Ross Kaffenberger",
    "url": "https://rossta.net"
  },
  "related_applications": [
    {
      "platform": "webapp",
      "url": "<%= root_url + "manifest.json" %>"
    }
  ],
  "icons": [
    {
      "src": "<%= image_url("app-icons/icon-64.png") %>",
      "type": "image/png",
      "sizes": "64x64"
    },
    {
      "src": "<%= image_url("app-icons/icon-192-maskable.png") %>",
      "type": "image/png",
      "sizes": "192x192",
      "purpose": "maskable"
    },
    {
      "src": "<%= image_url("app-icons/icon-192.png") %>",
      "type": "image/png",
      "sizes": "192x192",
      "purpose": "any"
    },
    {
      "src": "<%= image_url("app-icons/icon-512-maskable.png") %>",
      "type": "image/png",
      "sizes": "512x512",
      "purpose": "maskable"
    },
    {
      "src": "<%= image_url("app-icons/icon-512.png") %>",
      "type": "image/png",
      "sizes": "512x512",
      "purpose": "any"
    }
  ],
  "screenshots" : [
    {
      "src": "<%= image_url("screenshots/homepage.jpg") %>",
      "sizes": "1280x720",
      "type": "image/jpeg",
      "form_factor": "wide",
      "label": "Homescreen of Joy of Rails"
    },
    {
      "src": "<%= image_url("screenshots/color-schemes.jpg") %>",
      "sizes": "1280x720",
      "type": "image/jpeg",
      "form_factor": "wide",
      "label": "Personalized Settings for Joy of Rails"
    },
    {
      "src": "<%= image_url("screenshots/homepage-narrow.jpg") %>",
      "sizes": "400x720",
      "type": "image/jpeg",
      "form_factor": "narrow",
      "label": "Homescreen of Joy of Rails"
    },
    {
      "src": "<%= image_url("screenshots/color-schemes-narrow.jpg") %>",
      "sizes": "400x720",
      "type": "image/jpeg",
      "form_factor": "narrow",
      "label": "Personalized Settings for Joy of Rails"
    }
  ]
}And here‘s the rendered result your browser sees right now:
{
  "id": "joy-of-rails",
  "name": "Joy of Rails",
  "short_name": "Joy of Rails",
  "description": "A place to learn about Ruby on Rails and how it makes web development a joy",
  "start_url": "https://example.org/",
  "theme_color": "#c7d7f6",
  "background_color": "#f1f5fd",
  "display": "standalone",
  "orientation": "portrait",
  "author": "Ross Kaffenberger",
  "developer": {
    "name": "Ross Kaffenberger",
    "url": "https://rossta.net"
  },
  "related_applications": [
    {
      "platform": "webapp",
      "url": "https://example.org/manifest.json"
    }
  ],
  "icons": [
    {
      "src": "https://example.org/assets/app-icons/icon-64-71cf59a3.png",
      "type": "image/png",
      "sizes": "64x64"
    },
    {
      "src": "https://example.org/assets/app-icons/icon-192-maskable-e34da6b7.png",
      "type": "image/png",
      "sizes": "192x192",
      "purpose": "maskable"
    },
    {
      "src": "https://example.org/assets/app-icons/icon-192-724e1f5f.png",
      "type": "image/png",
      "sizes": "192x192",
      "purpose": "any"
    },
    {
      "src": "https://example.org/assets/app-icons/icon-512-maskable-59e6529f.png",
      "type": "image/png",
      "sizes": "512x512",
      "purpose": "maskable"
    },
    {
      "src": "https://example.org/assets/app-icons/icon-512-1160bcf3.png",
      "type": "image/png",
      "sizes": "512x512",
      "purpose": "any"
    }
  ],
  "screenshots" : [
    {
      "src": "https://example.org/assets/screenshots/homepage-b3b3e568.jpg",
      "sizes": "1280x720",
      "type": "image/jpeg",
      "form_factor": "wide",
      "label": "Homescreen of Joy of Rails"
    },
    {
      "src": "https://example.org/assets/screenshots/color-schemes-18368168.jpg",
      "sizes": "1280x720",
      "type": "image/jpeg",
      "form_factor": "wide",
      "label": "Personalized Settings for Joy of Rails"
    },
    {
      "src": "https://example.org/assets/screenshots/homepage-narrow-ac7f981a.jpg",
      "sizes": "400x720",
      "type": "image/jpeg",
      "form_factor": "narrow",
      "label": "Homescreen of Joy of Rails"
    },
    {
      "src": "https://example.org/assets/screenshots/color-schemes-narrow-c774819c.jpg",
      "sizes": "400x720",
      "type": "image/jpeg",
      "form_factor": "narrow",
      "label": "Personalized Settings for Joy of Rails"
    }
  ]
}
You‘ll see there‘s a few properties in the Joy of Rails manifest that we didn‘t cover in this article—the MDN guide on web app manifests serves as a good reference to learn more.
Got it? Now go install some Rails apps!
If you liked this article, please feel free to share it and subscribe to hear more from me and get notified of new articles by email.
Did you find a bug or do you have questions about the content? You can send me an email, connect with me on Twitter, Github, Mastodon, and/or Linkedin.
Curious to peek behind the curtain and get a glimpse of the magic? Joy of Rails is open source on Github. Feel free to look through the code and contribute.
That does it for another glimpse into what’s possible with Ruby on Rails. I hope you enjoyed it. 
More articles to enjoy
-
Sending Web Push Notifications from RailsAn embedded Web Push demo and deep dive recipe for Web Push notifications for a Ruby on Rails application in advance of Rails 8 Action Notifier.
-
Introducing Joy of RailsJoy of Rails is a Rails application dedicated to teaching and showing programmers how to use Ruby on Rails and highlighting news, notes, and contributions relevant to the broader Ruby on Rails community. It is open sourced on Github.
-
Custom Color Schemes with Ruby on RailsYou can edit the color scheme of this website right in content of this blog post. Play with the controls while we highlight the benefits of Rails, Hotwire, and CSS variables.